Section outline

  • ⚡ Chapter 2: Electricity, Circuits & Powering Robots

    Why Do Robots Need Electricity?

    Electricity isn’t just for lights and chargers — in robots, it’s what lets them think, sense, and move.

    Electric signals act like a robot’s brain and nerves, carrying messages to motors, sensors, and more.

    By learning basic circuits, you’ll understand how robots see the world and respond — and you’ll be ready to build your own smart machines!

    • 🔍 Two Types of Electricity

      • Static Electricity: Charge buildup on surfaces. (Like your hair rising after rubbing a balloon!)
      • Current Electricity: Flow of charge through wires — this powers robots and devices.

      💧 Water Analogy

      Think of electricity like water:
      Voltage = Water pressure 💦
      Current = Flow of water 🚿
      Wires = Pipes 🧰
      Turning on a switch = Opening a tap!

    • 🔄 What is a Circuit?

      A circuit is a closed loop where electricity flows. It needs:

      • 🔋 Power source (like a battery)
      • 🔌 Wires to carry current
      • 💡 Load (like a bulb or motor)
      • 🎚️ Switch to open/close the flow

      ⚠️ If the loop breaks, electricity won’t flow!

      🧠 Fun Fact

      Your brain also uses tiny electric signals — every blink or move starts with a spark inside you! ⚡

      🧪 Try This

      Rub a balloon on your hair and hold it near small paper bits — watch static electricity in action!

    • ⚡ Sources of Electricity

      Electricity powers robots — but where does it come from?

      • 🔋 Battery – Stores chemical energy (e.g., AA, 9V, button cells)
      • ☀️ Solar – Converts sunlight to electricity (used in solar robots)
      • 🔌 Wall Socket – Supplies power from the grid (used in homes/schools)
      • 🌬️ Wind/Water – Spins turbines for eco-friendly power
      • ⛽ Generator – Uses fuel (diesel/petrol) for backup electricity
      Source Use
      Battery Portable devices
      Solar Outdoor gadgets
      Socket Chargers, appliances
      Wind/Water Clean energy
      Generator Emergency backup
    • ⚡ What is Electrical Flow?

      Electricity flows through a material when electrons (tiny charged particles) move from one atom to another. But not all materials let electrons move easily.

      That’s where conductors and insulators come in.

    • 🧲 What are Conductors?

      Conductors let electricity flow easily — thanks to free-moving electrons.

      • Common Conductors: Copper, aluminum, silver, gold
      • ⚠️ Human body & tap water can conduct electricity (be careful!)

      🧠 Robots use copper wires to send power where it's needed.

    • 🚫 What are Insulators?

      • Insulators are materials that do NOT allow electricity to pass easily.

      • They protect us from getting shocked and help control the flow of electricity.

      📦 Common Insulators:

      Plastic, Rubber, Glass, Wood, Dry air

      🧤 That’s why electric wires are coated with plastic — to prevent shocks and short circuits.

    • 🛡️ Real-Life Applications

      Item Material Type Purpose
      Copper wires Conductor Carry electricity inside robots
      Plastic wire coating Insulator Keeps users safe
      Rubber gloves (electricians) Insulator Protection from shocks
      Metal robot arm Conductor Connects electronic components

      🎮 Fun Fact

      Have you ever touched a metal doorknob and felt a little zap? That’s static electricity! Your body acted like a conductor and released built-up charge.

  • Robots need electricity to power different parts like motors, sensors, and lights. There are two main ways to connect components in a circuit:

    • Series Circuit

    • Parallel Circuit

    • 🔗 Series Circuit (One Path Only)

      • Components are connected one after another.
      • Same current flows through all.
      • If one part fails, the whole circuit stops.
      • Voltage splits between components.

      Series Circuit

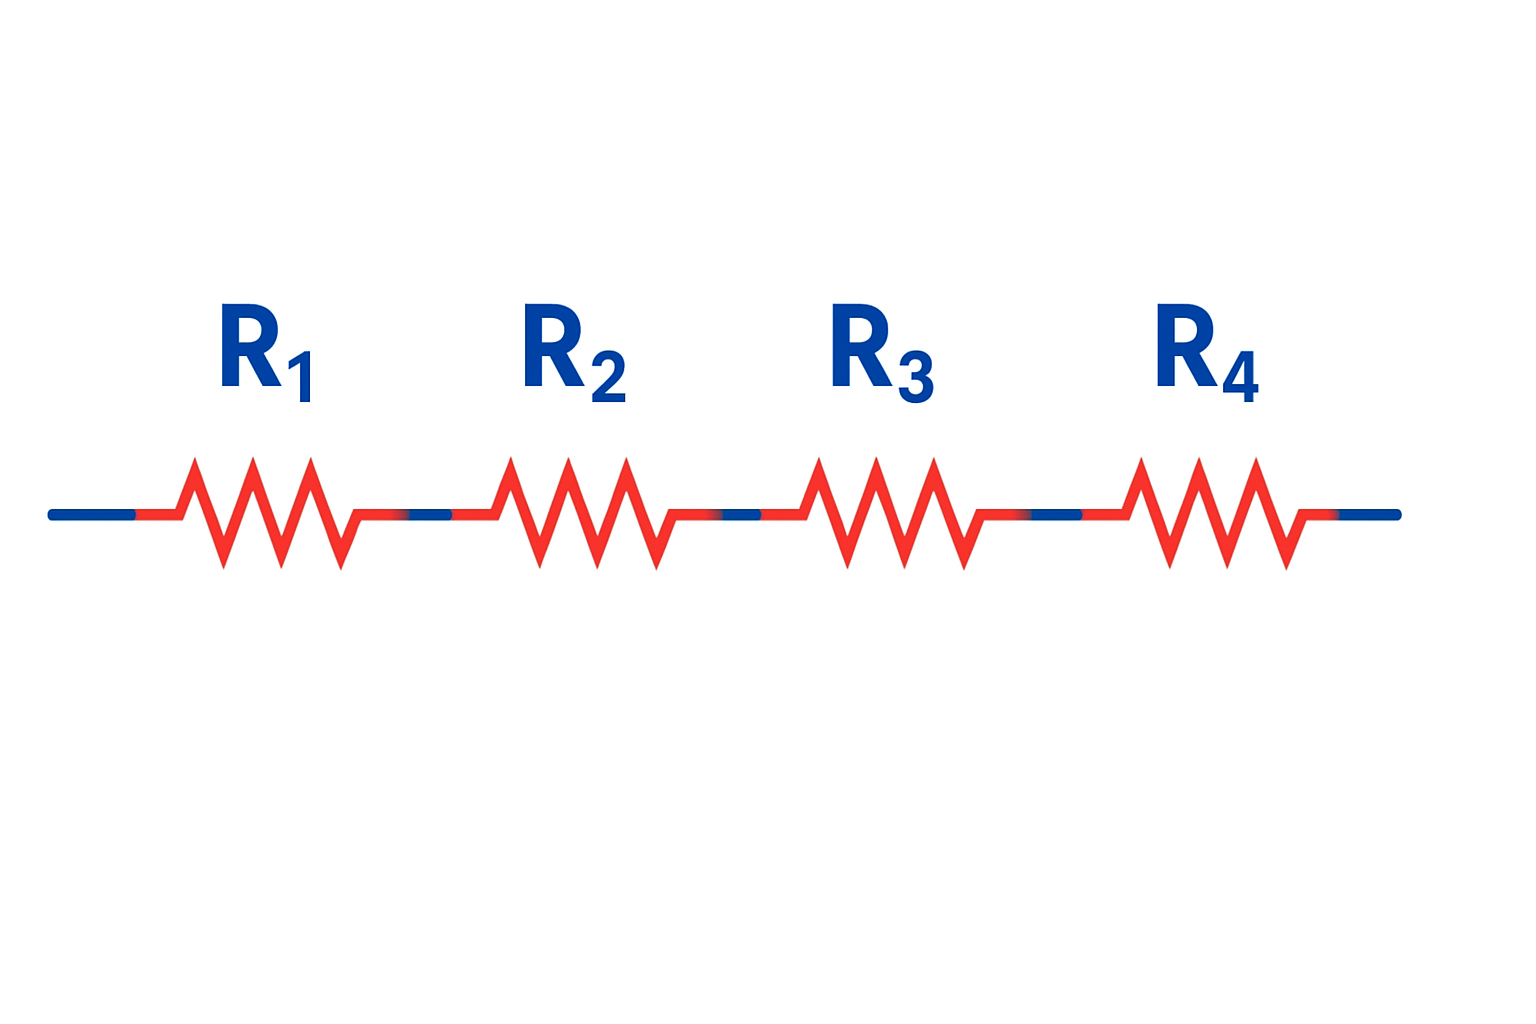
      🧪 Example: Old decorative lights — one bulb fails, all go dark.

    • 🔀 Parallel Circuit (Multiple Paths)

      • Each component has its own connection to the power source.
      • Electricity flows through multiple paths.
      • If one part fails, others keep working.
      • Each gets full voltage, so all bulbs glow equally.

      Parallel Circuit

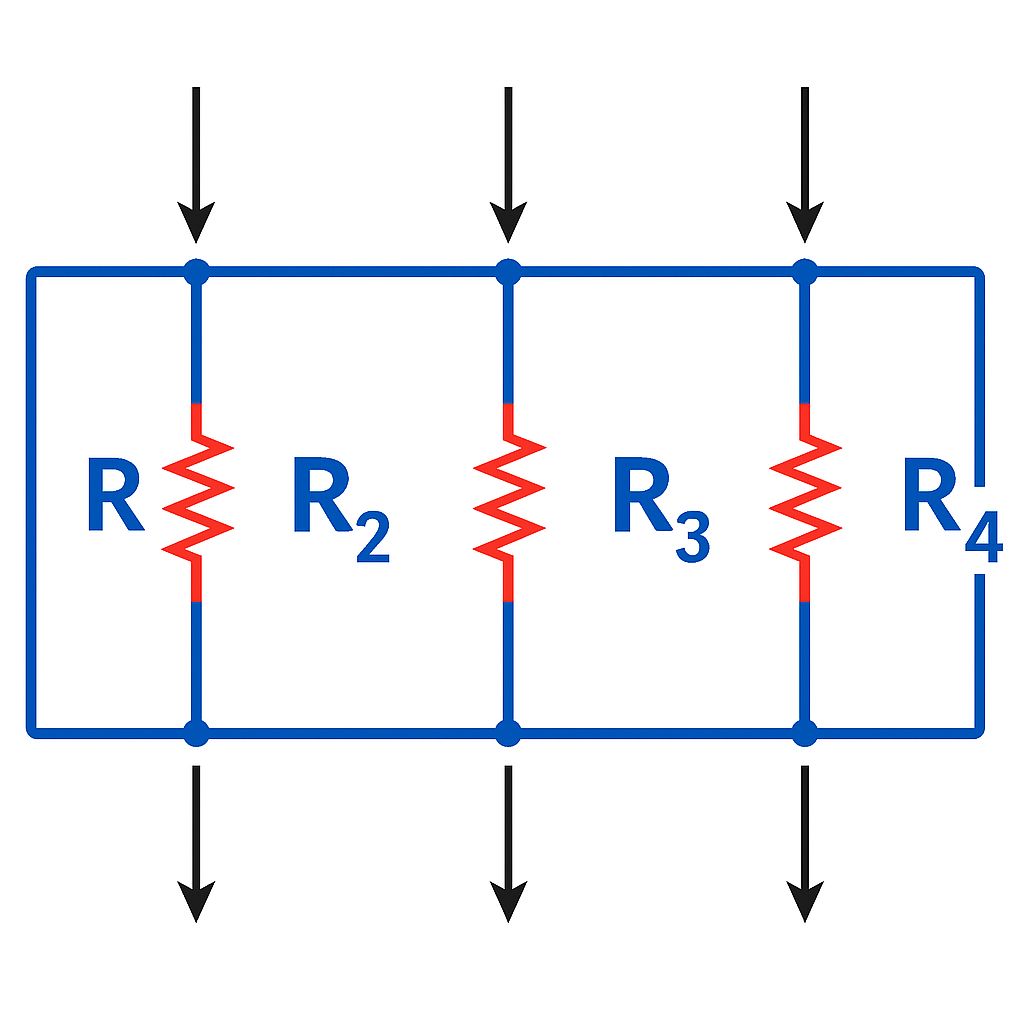
      🧪 Example: Home wiring — you can turn off one fan without affecting others.


    • ⚖️ Quick Comparison Table

      Feature Series Circuit Parallel Circuit
      Connection Style One path Multiple paths
      Current Flow Same through all components Divided among branches
      Voltage Distribution Divided across components Same for all components
      If one part fails... Entire circuit stops Other parts still work
      Common Use Low-power LED chains Homes, robots, appliances

      🤖 In Robotics

      • Use series circuits when you want a single path and simple control.

      • Use parallel circuits when different parts need to work independently, like motors and sensors running at the same time.

  • Robots use output devices to act — like moving motors, lighting LEDs, or buzzing sounds.

    • 🔁 What Are Output Devices?

      Output devices receive signals from a robot’s brain and perform actions like moving, lighting up, or making sounds.

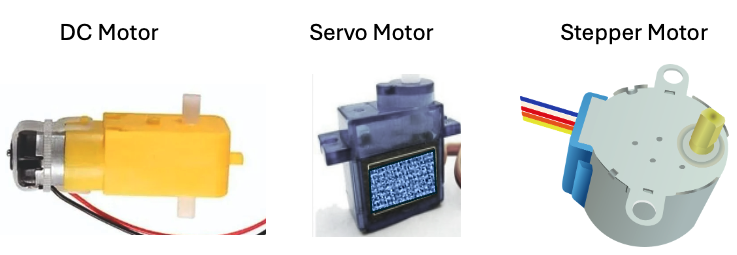
      ⚙️ 1. Motors – For Movement

      • DC Motor: Spins continuously (e.g. robot wheels)
      • Servo Motor: Turns to a set angle (e.g. robot arm)
      • Stepper Motor: Moves in small steps (e.g. 3D printer)

      💡 2. LEDs – For Indicators

      Used for signals like status, charging, or effects.

      • 🟢 Green = Ready
      • 🔴 Red = Low battery

      🔊 3. Buzzers – For Sounds

      • Passive Buzzer: Plays tones via code
      • Active Buzzer: Beeps with power 
    • 🤖 In Real Robots

      Robot Example Output Device Used What It Does
      Robot Vacuum Cleaner Motors Moves around room
      Toy Robot Dog LEDs, Buzzers, Motors Wags tail, barks, and lights up
      Smart Factory Arm Servo Motors Moves to pick and place objects

  • A robot is like a mini electronic city — wires carry power, LEDs light up, motors move, and the brain (microcontroller) controls everything.

    All parts must be connected using proper circuits to work smoothly.

    • 🧠 Robot’s Internal Communication

      A basic robot has:

      • Power Source – e.g., battery
      • Input Devices – sensors
      • Processing Unit – microcontroller (brain)
      • Output Devices – motors, LEDs, buzzers

      The circuit connects them all, just like a nervous system — the brain sends signals, and the body responds!

    • 🔄 Flow of Energy and Signals

      Example: Robot avoids a wall

      1. Sensor detects obstacle
      2. Sends signal to microcontroller
      3. Microcontroller decides: “Turn left!”
      4. Sends signal to DC motor
      5. Motor turns wheels – 🛞 Robot avoids obstacle

      All this happens in under a second — thanks to the connected circuit!

    • 📦 What’s Inside a Simple Robot Circuit?

      Part Role in the Circuit
      Battery Powers the whole system
      Switch/Button Turns robot on/off
      Microcontroller Brain that makes decisions
      Sensor (e.g., IR) Detects the world (like light or distance)
      Motor Driver Acts like a power booster for motors
      Motors/LEDs Act based on brain’s commands
      Wires Connect everything like roads in a city


  • Electricity is powerful — it helps bring robots to life! But it must be handled safely. To build and use robots properly, you need to understand which materials allow electricity to flow and how to protect yourself and your circuits.

    • 🔌 What Are Conductors?

      Conductors are materials that let electricity flow easily — like copper, aluminum, iron, and saltwater.

      🧠 Think: Conductors = Highway for electrons

      🪙 Fun fact: The shiny copper wire inside a charger is a great conductor!

    • 🚫 What Are Insulators?

      Insulators are materials that stop electricity — like rubber, plastic, dry wood, and glass.

      🧠 Think: Insulators = Wall for electrons

      🔌 Plug wires are covered in plastic to keep you safe from electric shocks!

    • 🦺 Why Safety Matters in Robotics

      Robots use electricity, so be careful! ⚠️ Shocks, short circuits, or burns can happen.

      Quick Safety Tips: Turn off power before wiring, use insulated tools, and never touch bare wires.

      🧪 Mini Experiment (with adult help)

      Test materials like spoon or rubber band with an LED circuit — if it lights up, it's a conductor!

      🌍 Cool Fact

      Electric eels create electricity to shock prey — nature’s own robot power!

  • Batteries are like lunchboxes for robots — they store energy! ⚡ Without power, a robot can’t move or think. Let’s learn how robots get and use this energy.

    • 🧃 Energy Source in Robotics

      Robots need electricity to work — and that comes from energy sources like batteries or power banks.

      🔋 Common Battery Types

      • AA/AAA: Simple, cheap, used in toys and basic circuits.
      • 9V: Compact, great for mini projects.
      • Li-ion / Li-Po: Rechargeable, powerful — used in drones and advanced robots.
      • Power Bank: USB-powered, great for Arduino or Raspberry Pi robots.

      ⚠️ Tip: Never mix old and new batteries — it can cause leaks or failure.

      🧠 Why Use Rechargeables? Save money, reduce waste, and even charge with solar panels!

    • 🪛 How Batteries Connect in Robots

      Batteries connect using:

      • Battery holders – keep them secure
      • Jumper wires – pass power to the circuit
      • Switches – turn power on/off

      ✅ Always check:

      • Voltage matches the robot's need
      • Polarity – positive (+) and negative (–) sides

      🎯 Tip: Wrong connection can damage your robot!

    • ⚖️ Choosing the Right Battery

      Think about:

      • Voltage – match what your robot needs (like 3.3V, 5V, etc.)
      • mAh – more mAh = longer use time
      • Size & Weight – small robots need light batteries
      • Rechargeable? – saves money and waste

      🔌 Fun Fact: Some insect-size robots run on tiny coin cells and can fly or crawl!

      🌿 Some nature-inspired robots even use sunlight or body heat to recharge!

      🧪 Try This: Battery Power Test

      Use a small motor and two battery types. Observe:

      • Which one spins the motor faster?
      • Which one lasts longer?

      🧯 Battery Safety Tips

      • Never short battery ends – it can get hot!
      • Store in dry places
      • Recycle old batteries safely
      • ⚠️ Never charge non-rechargeables
  • You’ve learned about electricity and power — now let’s connect everything. Breadboards and wires act like roads in your robot city, guiding electricity to where it’s needed!

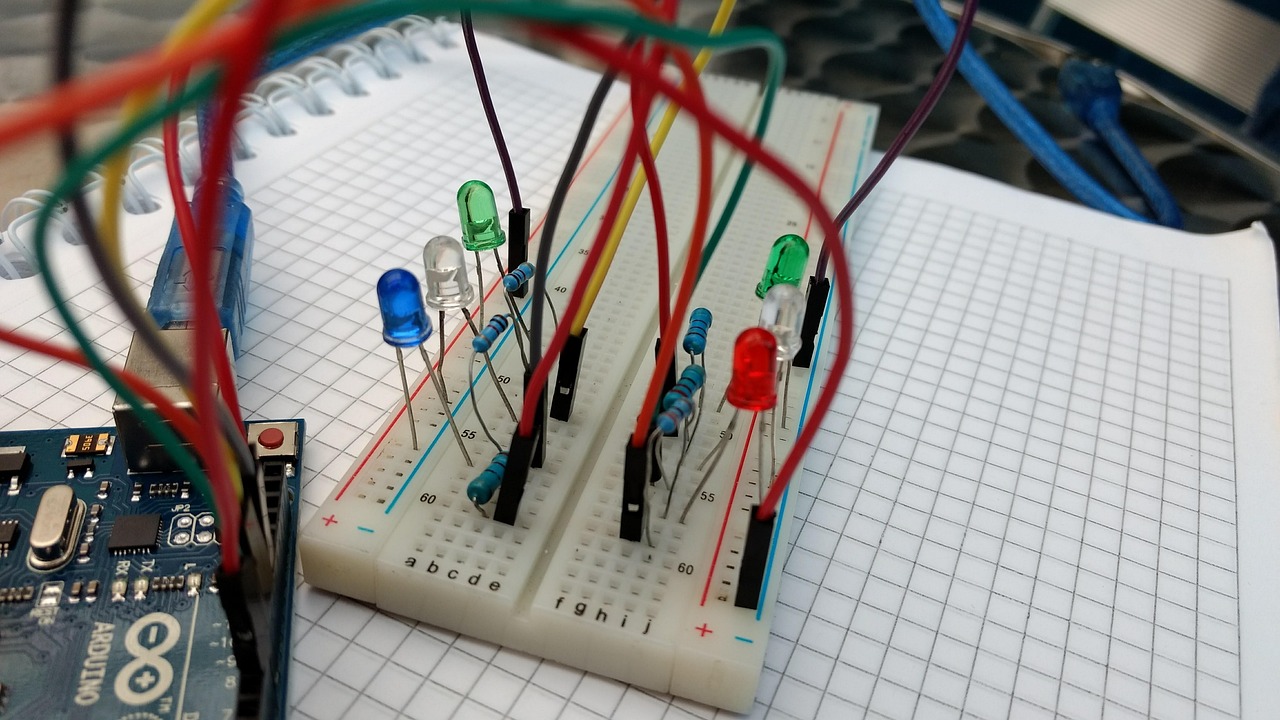
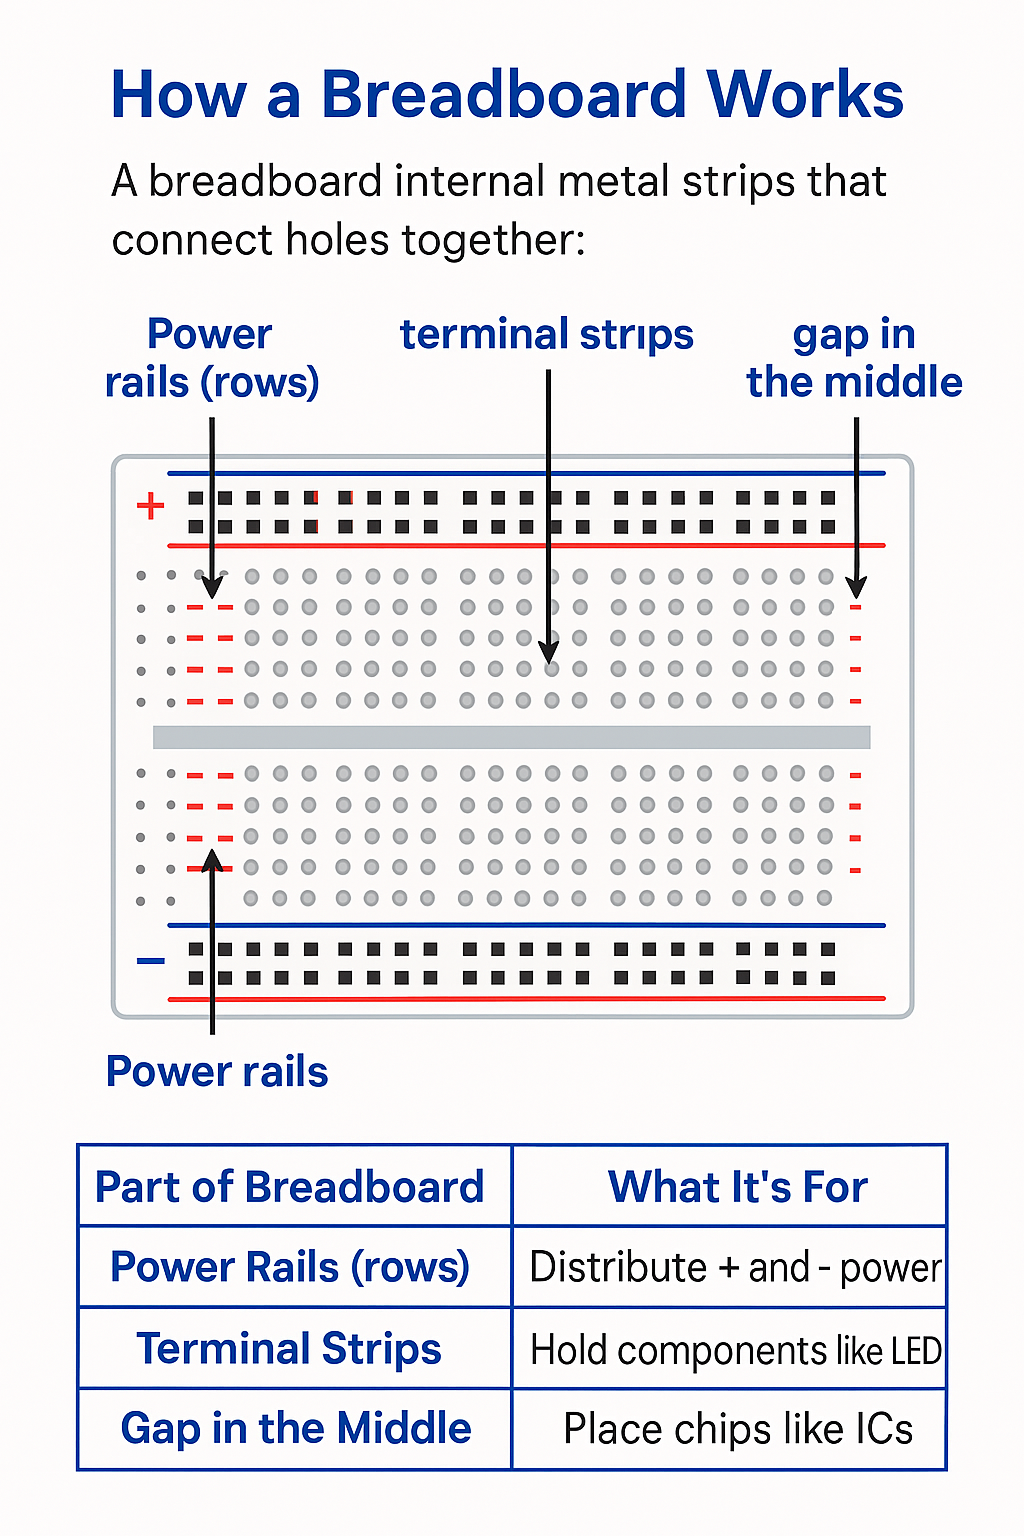
    • 🧠 What is a Breadboard?

      A breadboard lets you build circuits without soldering. Just plug in wires, sensors, LEDs, or an Arduino.

      Tip: It’s reusable — perfect for learning and testing!

      🧃 Why the Name?

      Early inventors used wooden bread-cutting boards with nails to build circuits. That’s how it got the name! 🍞

      🛣️ How It Works

      • Top/Bottom Rows: Power (+) and Ground (–)
      • Middle Columns: Connect components

      🧪 Try It!

      Place an LED and resistor on the breadboard, connect a battery — watch it glow!

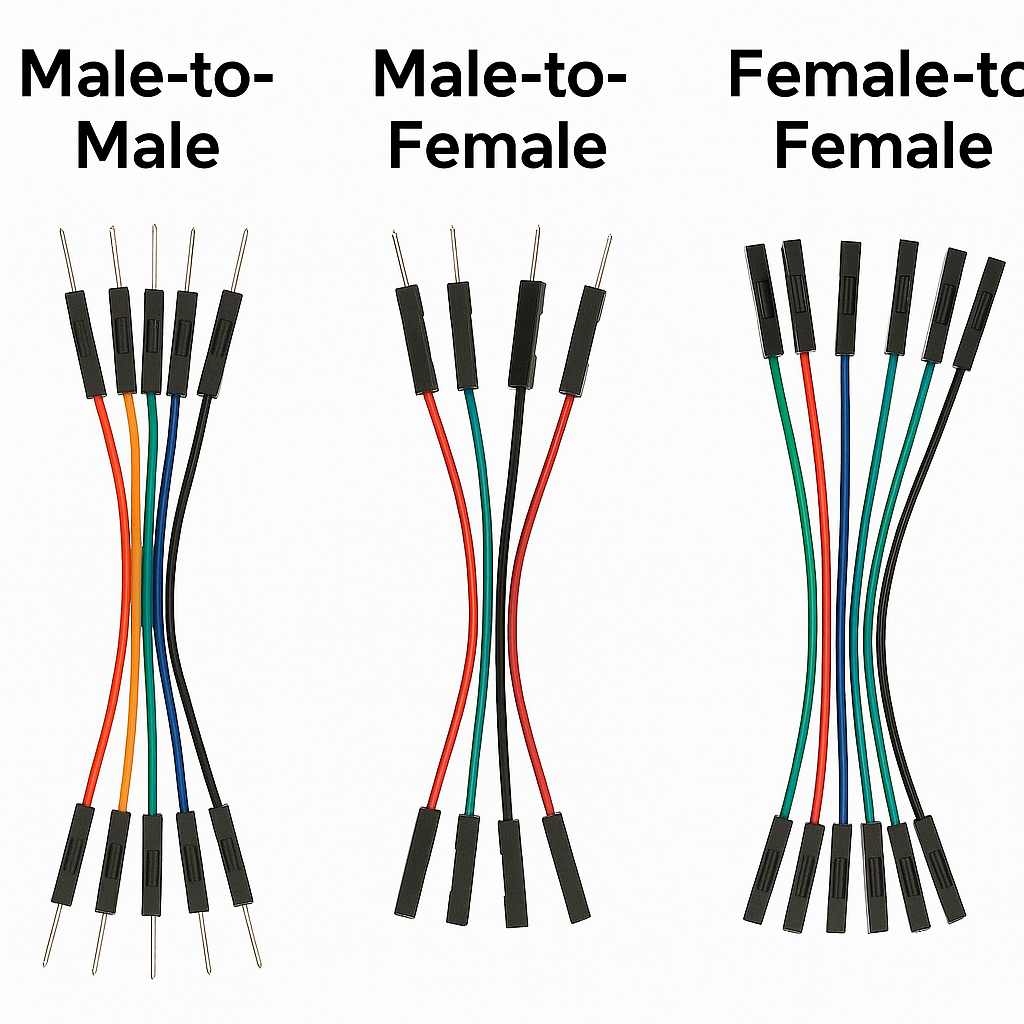
    • 🔌 What are Jumper Wires?

      Jumper wires are colorful wires with metal ends that help you connect different parts on a breadboard.

      Types of jumper wires:

      • Male-to-Male (most common)

      • Male-to-Female

      • Female-to-Female

      🎮 It’s like connecting puzzle pieces — each wire connects one idea to the next.

      While not mandatory, most people use these colors for clarity:

      Color Used For
      Red Power (+)
      Black Ground (–)
      Yellow Signal wires
      Green Extra connections


    • ⚠️ Common Mistakes

      • Connecting both LED legs to the same row
      • Skipping the resistor — can burn the LED!
      • Mixing up power (+) and ground (–)
      • Loose wires — double-check before turning on

      🤖 Tiny Tech!

      Some breadboards are coin-sized — used in fingertip-sized robots. Small but smart!

      🧪 Challenge: Light It Up

      You need: Breadboard, LED, 220Ω resistor, 2 jumper wires, battery/USB power

      1. Place LED on the board
      2. Short leg → Resistor → Ground (–)
      3. Long leg → Power rail (+)

      🌟 See the LED glow!

      Component Connected To
      LED (long leg) Power (+)
      LED (short leg) Resistor → Ground (–)
  • You’ve learned how electricity powers robots, how to build circuits using LEDs, resistors, and breadboards, and how to connect batteries safely.

    Ready for a quick quiz to test your basics before moving ahead?