02. Electricity, Circuits & Powering Robots

Breadboards and Basic Wiring
Section outline
-
You’ve learned about electricity and power — now let’s connect everything. Breadboards and wires act like roads in your robot city, guiding electricity to where it’s needed!
-
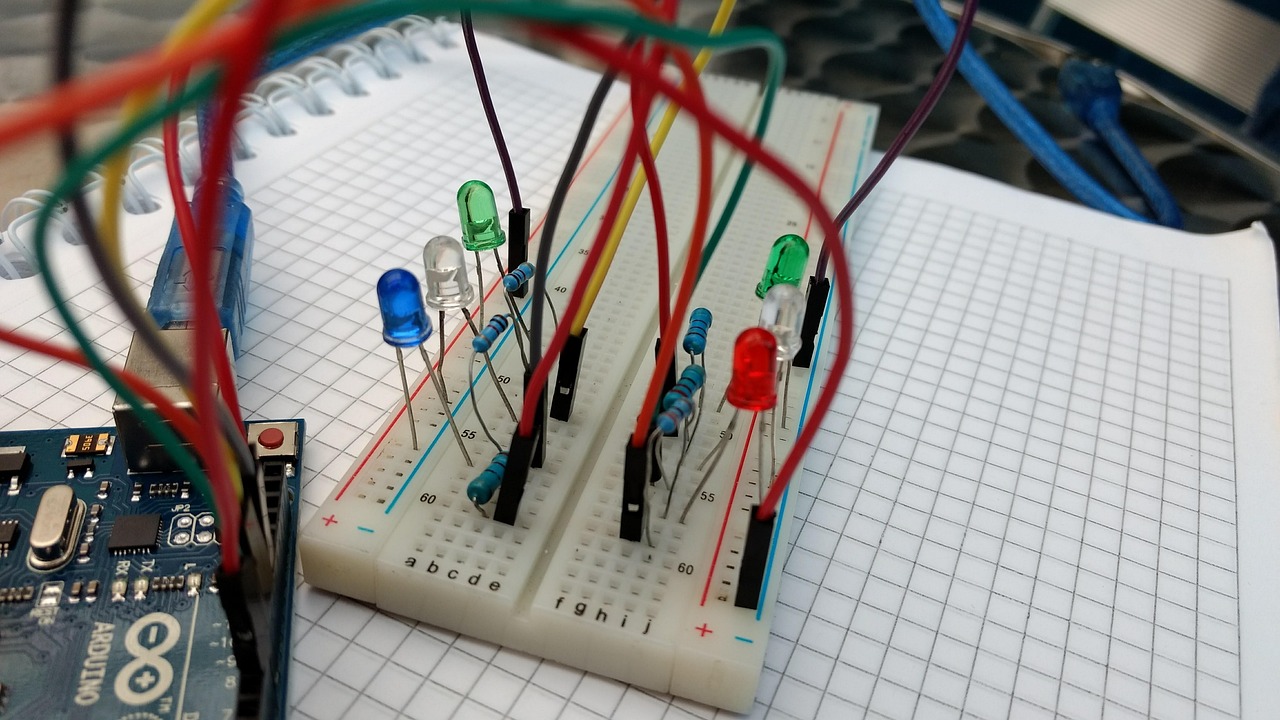
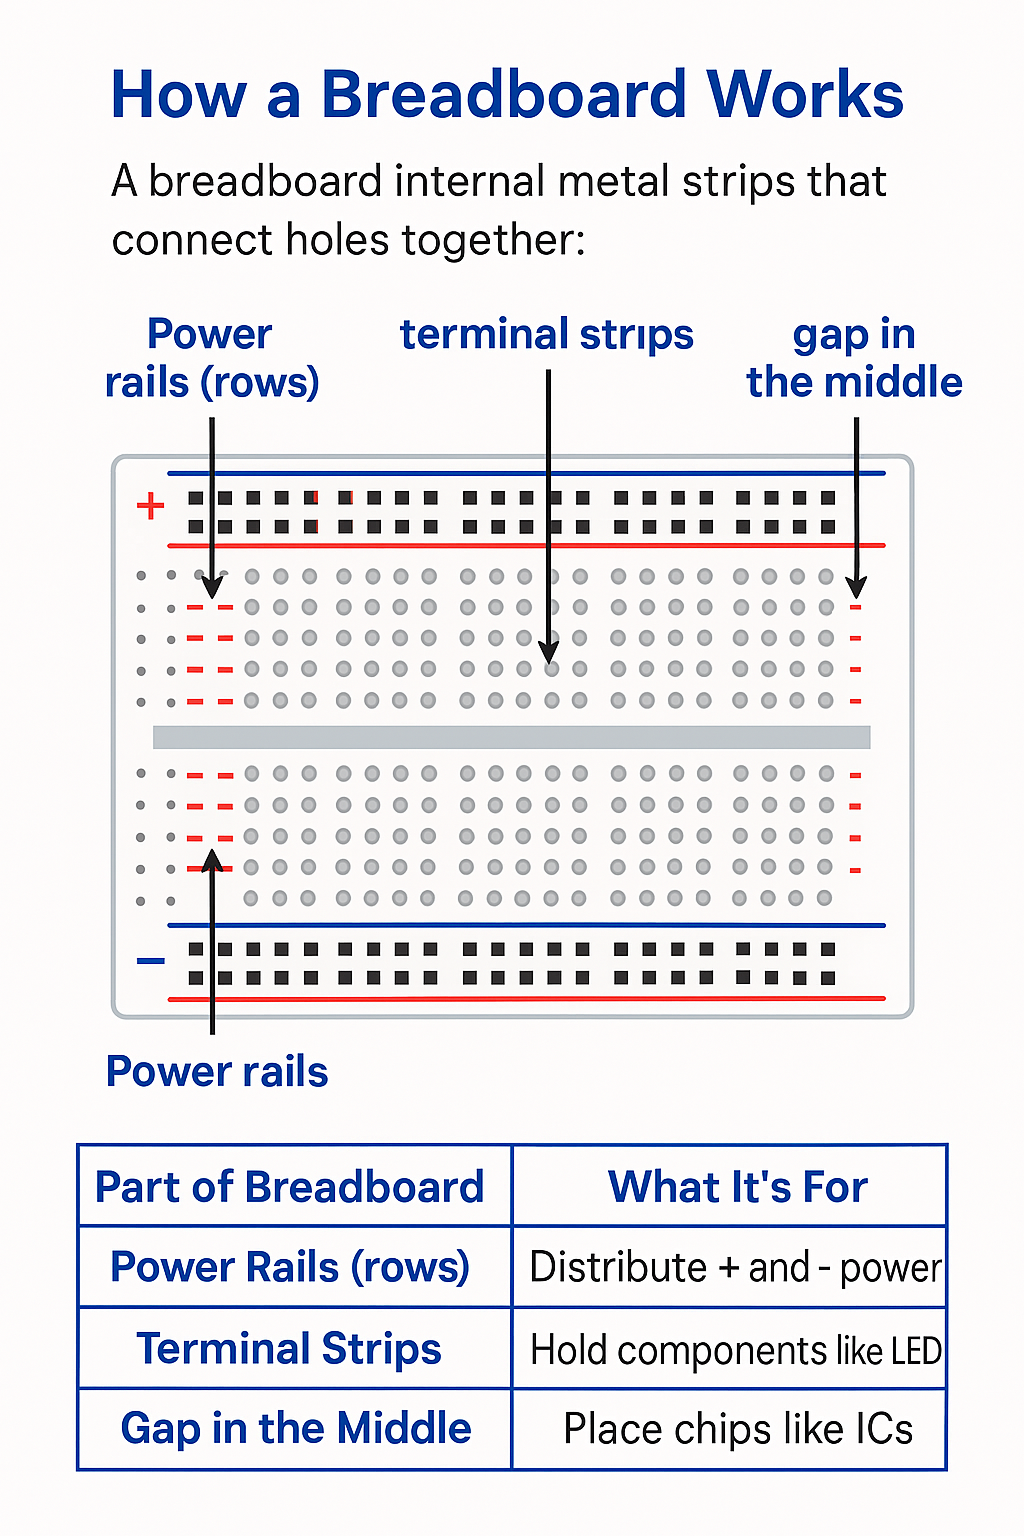
🧠 What is a Breadboard?
A breadboard lets you build circuits without soldering. Just plug in wires, sensors, LEDs, or an Arduino.
Tip: It’s reusable — perfect for learning and testing!
🧃 Why the Name?
Early inventors used wooden bread-cutting boards with nails to build circuits. That’s how it got the name! 🍞
🛣️ How It Works
- Top/Bottom Rows: Power (+) and Ground (–)
- Middle Columns: Connect components
🧪 Try It!
Place an LED and resistor on the breadboard, connect a battery — watch it glow!
-
🔌 What are Jumper Wires?
Jumper wires are colorful wires with metal ends that help you connect different parts on a breadboard.
Types of jumper wires:
-
Male-to-Male (most common)
-
Male-to-Female
-
Female-to-Female
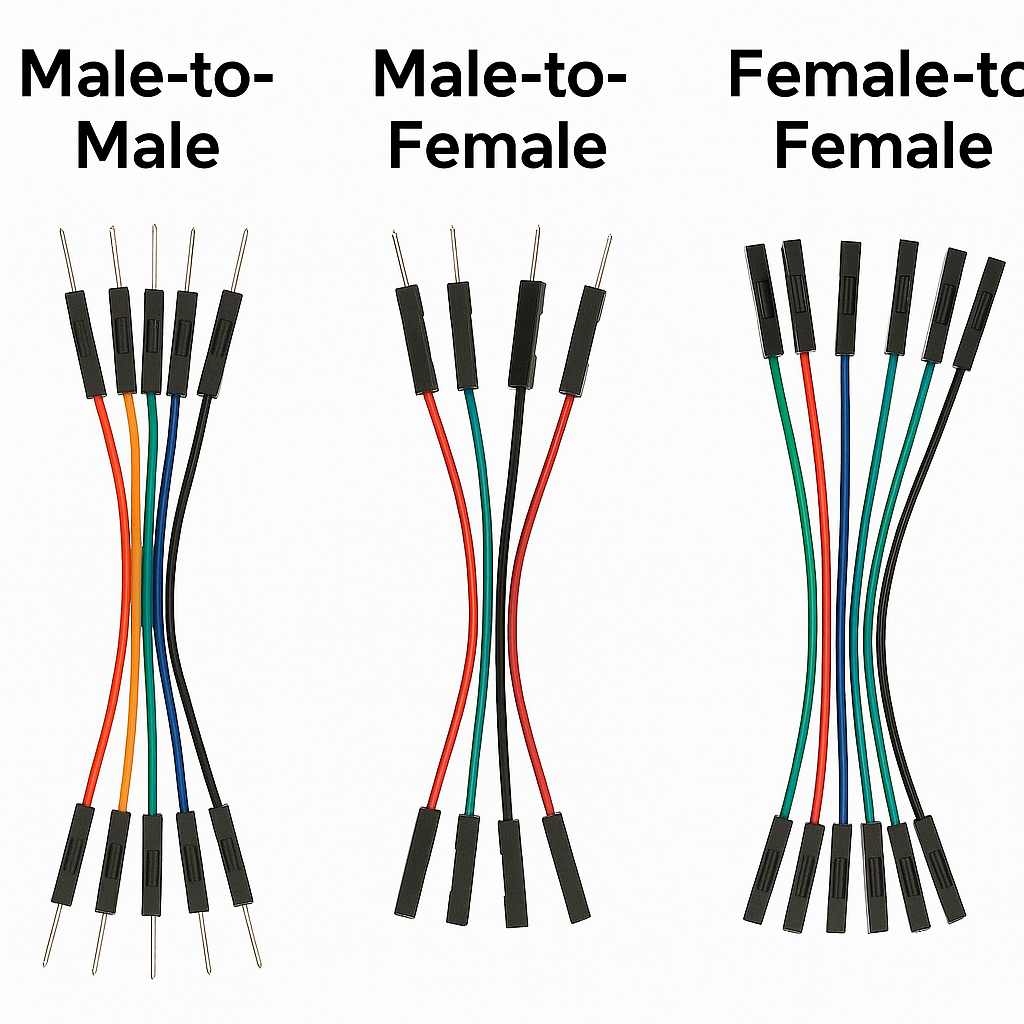
🎮 It’s like connecting puzzle pieces — each wire connects one idea to the next.
While not mandatory, most people use these colors for clarity:
Color Used For Red Power (+) Black Ground (–) Yellow Signal wires Green Extra connections -
-