06. Arduino Foundations

Section outline
-
Arduino comes in many shapes and sizes! While the Arduino Uno is the most beginner-friendly board, there are many other versions made for different kinds of projects — from wearable tech to powerful robots.
-
Now that you know what Arduino is, let’s dive deeper and explore what the Arduino board actually looks like. If you’ve never seen one before, don’t worry — by the end of this section, it will feel like a familiar friend!
-
Before you can bring your robot to life, you need a way to talk to your Arduino board. That’s where the Arduino IDE (Integrated Development Environment) comes in. It’s a free software that helps you write code and send it to the Arduino.
-
Now that your Arduino is set up, let’s dive into one of the most fun and satisfying parts of learning electronics – making things blink and react!
-
🚦 Our First Interaction – Button + LED
Now that you’ve seen how to writre a code to blink an LED, let’s make things more interactive! In this section, we’ll build a simple circuit where pressing a button will turn an LED on or off. This introduces how inputs (like buttons) can control outputs (like LEDs).
-
🧩 Step-by-Step Instructions:
- Connect the LED:
- Connect the longer leg (anode) of the LED to digital pin 13 via a 220Ω resistor.
- Connect the shorter leg (cathode) to the GND rail on the breadboard.
- Set up the button:
- Place the button on the breadboard across the gap so it straddles the middle.
- Connect one leg of the button to 5V on the Arduino.
- Connect the opposite leg to digital pin 2 and also to GND via a 10kΩ resistor (this is called a pull-down resistor).
🔌 Circuit Diagram:
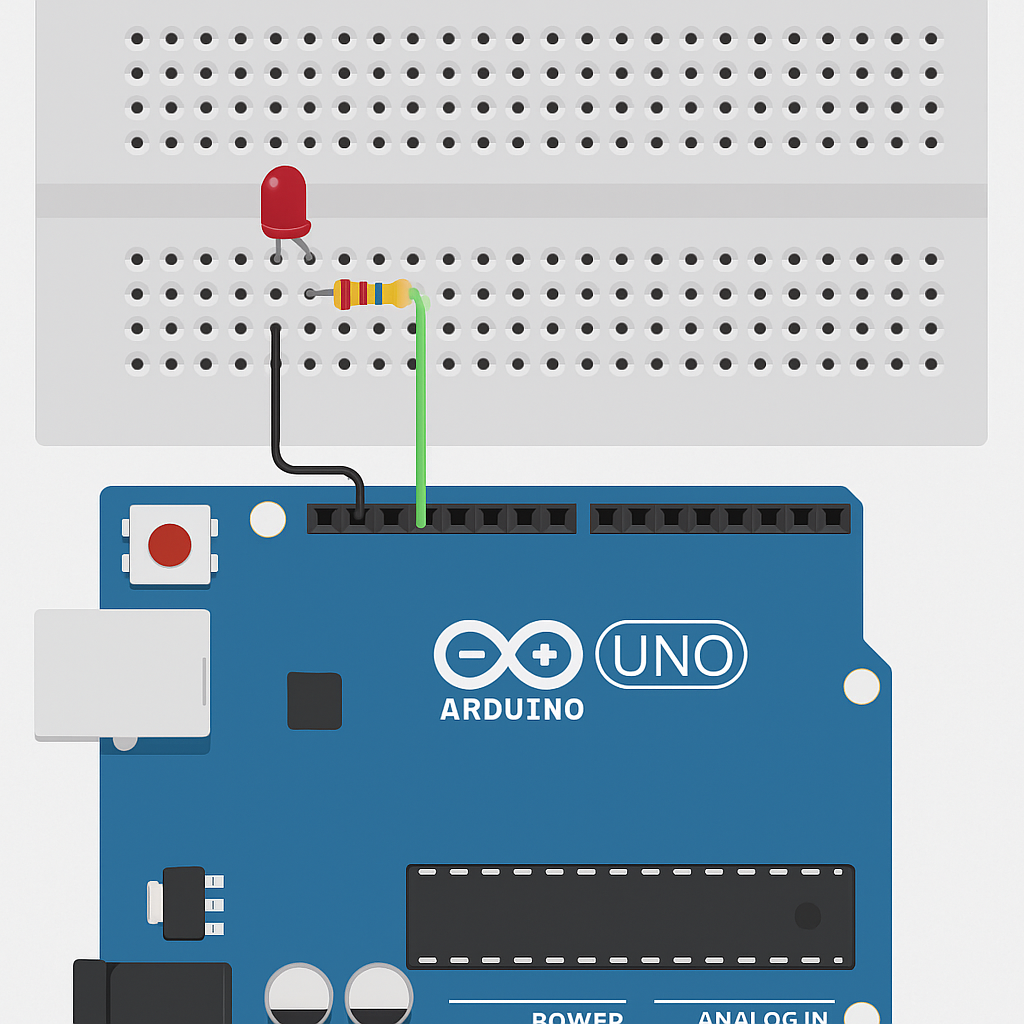
- Connect the LED:
-
🚀 Bringing It All Together – Run, Test, Debug
Now that everything is wired and coded, it’s time to test your first interactive Arduino project!
-
✅ Steps to Run:
- Open the Arduino IDE on your computer.
- Select the correct board: Tools > Board > Arduino UNO.
- Select the correct port: Tools > Port (usually something like COM3 or ttyUSB0).
- Copy and paste the sample code into the IDE.
- Click the Upload button (right arrow icon).
- Wait for the message Done uploading in the status bar.
🧪 How to Test:
- Press the button on the breadboard.
- If the LED lights up while pressing and turns off when released – 🎉 it works!
- If not, don’t worry — that’s what debugging is for.
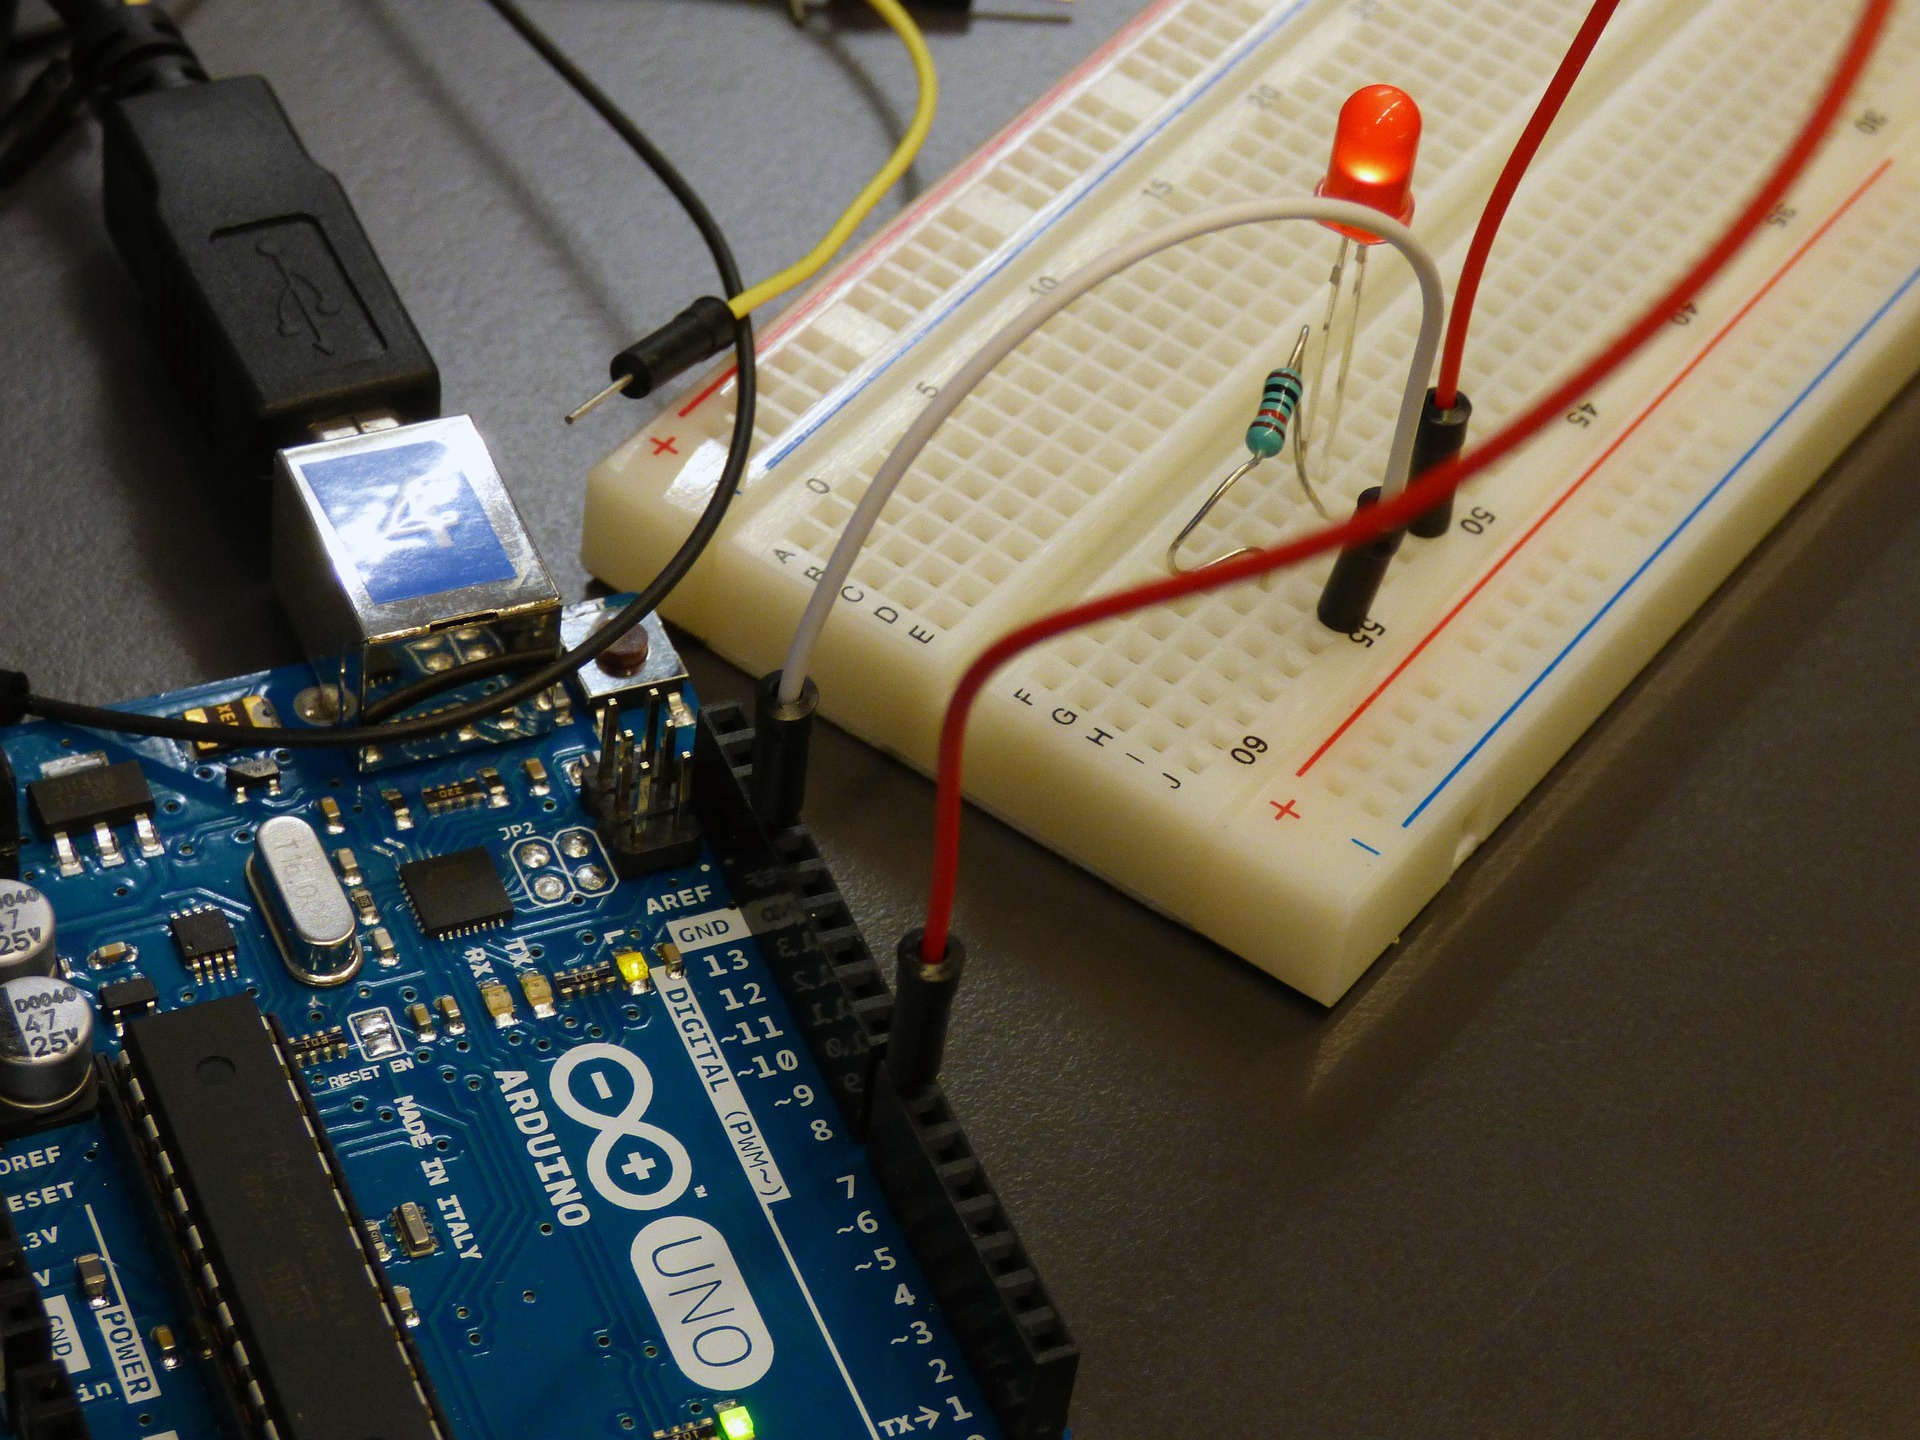
Your set-up will look something similar, do check the PIN's ID and change the code accordingly.
-
-
Congratulations! You have completed your journey through the basics of Arduino. You now understand what Arduino is, how to set it up, connect components like LEDs and buttons, and write simple programs to make things happen in the real world. These skills form the foundation for building real robots and interactive systems. Let us test your understanding with a quick quiz before we move ahead!